플젝 진행하면서 정리한 내용입니다! 틀린 내용이 있을 수도 허접 할 수도 있습니다.. 지적 대 환영, 꿀팁 대 환영
맵킷에 대한 정보는 정말이지 별로 없다..
정리하고 보니 별거 아닌 내용을 얼마나 붙잡고 있던걸까 흑흑
1. 커스텀 어노테이션 등록하기 (viewFor)
2. 어노테이션 선택에 따라 디자인 변경하기 (didSelect, didDeSelect)
3. 식별자가 다른 어노테이션을 만들어 서로 다른 기능을 하도록 구현하기
💡 커스텀 어노테이션 등록하기
해당 부분은 검색하면 정보가 꽤나 많이 나온다. 때문에 어렵지 않다.
mapkit delegate는 연결되어 있을 것이고, delegate를 채택한 후 진행한다.

MKMapViewDelegate에 구현된 viewFor 매개변수가 있는 메서드를 사용한다.
해당 메서드로 커스텀 한 annotation을 사용할 수 있다.
일단은 먼저 custom annotation 부터 만들자
CustomAnnotation
final class CustomAnnotation: NSObject, MKAnnotation {

    let placeID: String
    @objc dynamic var coordinate: CLLocationCoordinate2D

    init(placeID: String, coordinate: CLLocationCoordinate2D) {
        self.placeID = placeID
        self.coordinate = coordinate
        super.init()
    }

}
CustomAnnotationView
import Foundation
import UIKit

final class CustomAnnotationView: BaseAnnotationView {

    static let identifier = "CustomAnnotationView"


    let backView = {
        let view = UIView()
        view.backgroundColor = .clear
        view.layer.shadowColor = UIColor.black.cgColor
        view.layer.shadowOffset = .zero
        view.layer.shadowRadius =
        view.layer.shadowOpacity = 0.5
        view.clipsToBounds = false
        return view
    }()

    let imageView = {
        let view = UIImageView()
        view.backgroundColor = .clear
        view.image = Image.ImageName.starImage
        view.contentMode = .scaleAspectFit
        view.tintColor = Constants.Color.pinColor
        view.layer.cornerRadius = view.frame.width / 2
        view.clipsToBounds = true
        return view
    }()
    override func configUI() {
        addSubview(backView)
        backView.addSubview(imageView)

    }

    override func setConstraints() {
        backView.snp.makeConstraints { make in
            make.size.equalTo(40)
        }
        imageView.snp.makeConstraints { make in
            make.edges.equalTo(backView).inset(5)
        }
    }

    override func prepareForReuse() {
        super.prepareForReuse()

        guard let _ = annotation as? CustomAnnotation else { return }
        setNeedsLayout()

    }

    override func layoutSubviews() {
        super.layoutSubviews()
        bounds.size = CGSize(width: 40, height: 40)
        centerOffset = CGPoint(x: 0, y: bounds.size.width / 2)
    }

}
CustomAnnotation은 MKAnnotation을 상속받고, CustomAnnotationView는 MKAnnotationView를 상속 받는다.
나는 각 어노테이션마다 정보를 가지고 있고, 해당 정보를 통해 DB에 접근하거나 CRUD를 수행하기 위한 placeID 프로퍼티를 추가하였다.
주로 CustomAnnotation 클래스에서 title과 subtitle을 지정하여 사용하는 것 같다.
CustomAnnotation으로도 이미지를 변경할 수 있지만, UIImageView를 사용하여 어노테이션에 그림자 설정과 tint color등 디자인을 변경하고 싶었기 때문에 CustomAnnotationView에서 UI 설정을 진행했다.
CustomAnnotationView register
마치 collection view의 custom cell을 등록하는 것과 비슷한 구조이다.
지도를 띄울 뷰에 register 코드를 작성한다.
mainView.mapView.register(CustomAnnotationView.self, forAnnotationViewWithReuseIdentifier: CustomAnnotationView.identifier)viewFor
func mapView(_ mapView: MKMapView, viewFor annotation: MKAnnotation) -> MKAnnotationView? {

		// 현 위치 annotation을 변경하지 않기 위해 사용
    guard !annotation.isKind(of: MKUserLocation.self) else { return nil }

    var annotationView: MKAnnotationView?

    if let annotation = annotation as? CustomAnnotation {
        annotationView = mainView.mapView.dequeueReusableAnnotationView(withIdentifier: CustomAnnotationView.identifier, for: annotation)

    }

    return annotationView
}
이것도 컬렉션 뷰와 비슷한 것이 보인다.
등록할 annotation의 타입을 CustomAnnotation으로 다운캐스팅 해주고, CustomAnnotation 타입인 annotation을 CustomAnnotationView에 추가하여 리턴한다.
Annotation도 컬렉션 뷰와 마찬가지로 재사용해야 하기 때문에 dequeueReusableAnnotaitonView를 사용한다.
이렇게 구현 후 똑같이 addAnnotation을 하면 원하는 모양대로 나올 것이다!

💡 어노테이션 선택에 따라 디자인 변경하기
어노테이션을 선택했을 때, 선택 해제 했을 때 디자인을 다르게 하고 싶다!
그렇다면 MKAnnotationView Delegate에 didSelect , didDeSelect 메서드를 사용하자
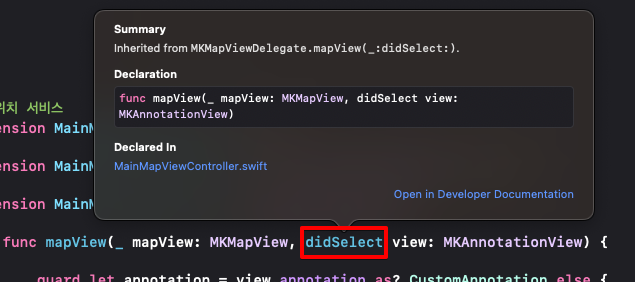

해당 메서드에 print를 한 후 어노테이션을 클릭해보면 어떠한 일을 하는지 단번에 알 수 있다.
didSelect
func mapView(_ mapView: MKMapView, viewFor annotation: MKAnnotation) -> MKAnnotationView? {

		// 현 위치 annotation을 변경하지 않기 위해 사용
    guard !annotation.isKind(of: MKUserLocation.self) else { return nil }

    var annotationView: MKAnnotationView?

    if let annotation = annotation as? CustomAnnotation {
        annotationView = mainView.mapView.dequeueReusableAnnotationView(withIdentifier: CustomAnnotationView.identifier, for: annotation)

    }

    return annotationView
}
내가 변경하려는 어노테이션의 타입은 CustomAnnotationView이기 때문에 CustomAnnotationView로 캐스팅이 되지 않는다면 return 해준다.
CustomAnnotationView에 만든 imageView의 디자인을 수정해준다!
didDeselect
선택이 해제되면 다시 원래대로 바껴야 하니까..
func mapView(_ mapView: MKMapView, didDeselect view: MKAnnotationView) {
    guard let view = view as? CustomAnnotationView else { return }
    view.imageView.image = Image.ImageName.starImage
    view.imageView.tintColor = Constants.Color.pinColor
}
didSelect에서 구현한 것과 동일하다!
해제 될 때 원래 값으로 넣어 주면 된다.

💡 식별자가 다른 어노테이션을 만들어서 다른 기능을 하도록 구현하기
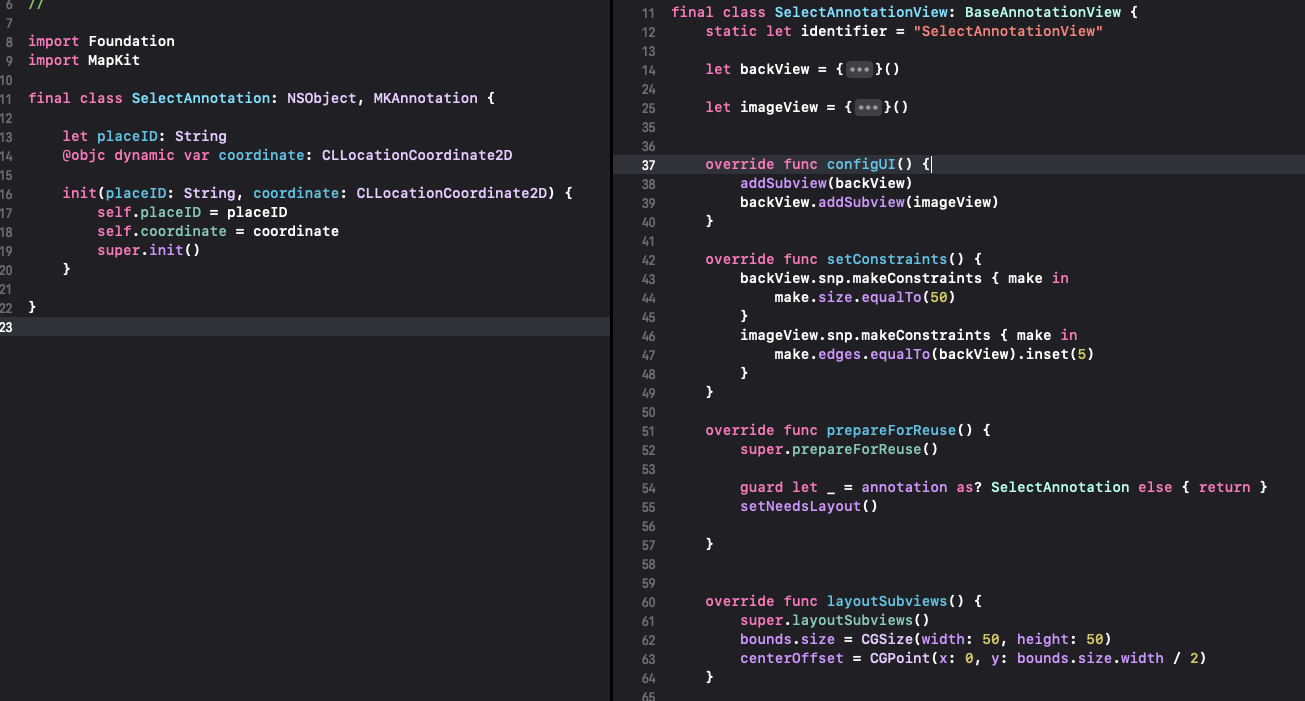
해당 부분은 고민하다가.. 결국엔 별개의 CustomAnnotation을 만드는 것이 좋겠다고 판단하였다.
CustomAnnotation과 거의 동일하게 작성한다. 원하는 디자인을 해주고
identifier만 다르게 설정해준다.
SelectAnnotationView도 똑같이 등록해준다.
mainView.mapView.register(SelectAnnotationView.self, forAnnotationViewWithReuseIdentifier: SelectAnnotationView.identifier)viewFor, isKind(of: )
func mapView(_ mapView: MKMapView, viewFor annotation: MKAnnotation) -> MKAnnotationView? {

    guard !annotation.isKind(of: MKUserLocation.self) else { return nil }

    var annotationView: MKAnnotationView?
    if annotation.isKind(of: SelectAnnotation.self) {
        if let annotation = annotation as? SelectAnnotation {
            annotationView = mainView.mapView.dequeueReusableAnnotationView(withIdentifier: SelectAnnotationView.identifier, for: annotation)
        }
    } else if annotation.isKind(of: CustomAnnotation.self) {
        if let annotation = annotation as? CustomAnnotation {
            annotationView = mainView.mapView.dequeueReusableAnnotationView(withIdentifier: CustomAnnotationView.identifier, for: annotation)

        }
    }
    return annotationView
}
등록하려는 annotation이 어떠한 타입이냐에 따라 다르게 처리해준다.
.isKind(of: )를 사용하여 타입 체크를 하여 재사용 annotation을 추가하면 완료!
두 개의 어노테이션이 따로 작동하는 것을 볼 수 있다.
도움을 주신 여러 개발 블로그들께 감사를.. 흑흑
'iOS > UIKit&SwiftUI' 카테고리의 다른 글
| View의 Drawing Cycle (0) | 2023.11.11 |
|---|---|
| [iOS/Swift] MapKit Annotation displayPriority 지정하기 (1) | 2023.10.20 |
| [iOS/Swift] search bar 에 테두리와 그림자 동시 적용하기 - clipsToBounds (0) | 2023.10.01 |
| [iOS/Swift] MapKit - 원하는 곳에 어노테이션을 찍어보자 (1) | 2023.10.01 |
| [iOS/Swift] MapKit - 위치 권한 설정을 구현해보자! (1) | 2023.10.01 |